


If you’ve tried making chocolate syrup at home only to end up with a watery mess that slides right off your ice cream, you’re not alone. The promise of a quick three-ingredient recipe sounds perfect until you realize it’s thinner than what you started with and tastes flat. This recipe fixes that. You’ll get thick, glossy homemade chocolate syrup that actually coats a spoon, stores for weeks, and costs about 66 cents per batch instead of three dollars at the store.
The secret isn’t more ingredients. It’s understanding why most recipes fail and what actually makes syrup cling to your chocolate milk instead of sinking to the bottom of the glass.
Why Homemade Beats Store-Bought
Store-bought chocolate syrup works fine until you read the label. High fructose corn syrup, preservatives, and a ingredient list that reads like a chemistry experiment. The chocolate-flavored syrup category holds 29% of the global syrup market, but health concerns over sugar and calories are pushing people toward cleaner options.
Making your own gives you control. You know exactly what goes in. You can adjust sweetness. You save money. A homemade batch costs roughly 66 cents compared to paying three dollars for a bottle that contains ingredients you can’t pronounce. The organic chocolate syrup segment now holds 22% of the market because people want clean-label products. Your kitchen becomes that clean label.
The taste difference shows up immediately. Homemade syrup has deeper cocoa flavor without the metallic aftertaste some brands leave behind. You control the sweetness level. You can make it as thick or thin as your use requires.
The Perfect Chocolate Syrup Recipe Card
Ingredients:
- 1 cup water
- 3/4 cup granulated sugar
- 3/4 cup cocoa powder (Dutch-process works best)
- 1/4 teaspoon salt
- 1 teaspoon vanilla extract
Instructions:
- Combine water and sugar in a medium saucepan over medium heat. Stir until sugar dissolves completely, about 2 minutes.
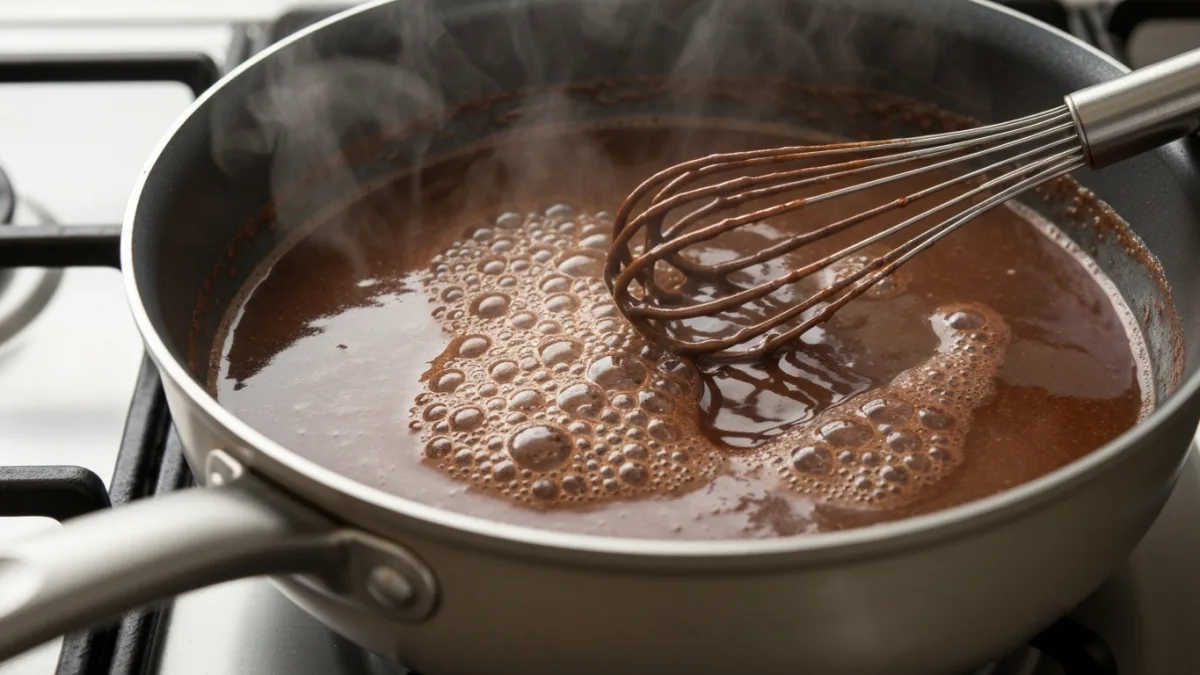
- Whisk in cocoa powder and salt. The mixture will look grainy at first. Keep whisking.
- Bring to a gentle boil, then reduce heat to medium-low. Let it simmer for exactly 4 minutes, whisking every 30 seconds.
- Remove from heat. The syrup will still look thin. This is normal.
- Stir in vanilla extract.
- Pour into a glass jar or bottle. Let cool to room temperature, then refrigerate.
Yield: About 1.5 cups
Prep time: 2 minutes
Cook time: 8 minutes
Storage: Refrigerate up to 2 weeks
Ingredient Science: Why Cocoa Type Wins
Not all cocoa powder creates the same syrup. Dutch-process cocoa gets treated with alkali, which neutralizes its acidity and darkens the color. This produces smoother, less bitter syrup with a color closer to what you expect from store brands. Natural cocoa powder works too, but you’ll notice sharper, fruitier notes and a lighter brown color.
I tested both side by side. Dutch-process created syrup that tasted balanced and rich right away. Natural cocoa needed an extra tablespoon of sugar to reach the same sweetness level because its acidity made it taste more bitter. The texture was identical, but the flavor profile differed enough that my kids noticed.
Granulated sugar dissolves cleanly and keeps the syrup smooth. I tried honey in one batch, thinking it would add depth. It did, but it also crystallized in the fridge after five days. Brown sugar made the syrup taste like chocolate caramel, which wasn’t bad but wasn’t what I wanted for chocolate milk.
Salt matters more than you’d think. That quarter teaspoon doesn’t make the syrup taste salty. It amplifies the chocolate flavor the same way salt makes cookies taste more buttery. Skip it and your syrup will taste flat.
Step-by-Step: No-Fail Method with Timings
Start with a cold saucepan. Add water and sugar together before turning on the heat. This prevents the sugar from clumping on a hot pan bottom.
Heat to medium. You want gentle warmth that dissolves sugar without scorching. Stir with a wooden spoon or silicone spatula until the liquid runs clear, about 2 minutes. If you see sugar crystals on the spoon, keep stirring.
Whisk in cocoa powder and salt all at once. The mixture will seize up and look like wet sand. This freaks people out, but it’s supposed to happen. Keep whisking. Within 30 seconds, it smooths into a thin liquid.
Bring to a gentle boil. You’ll see small bubbles breaking the surface. Once it reaches this point, lower the heat to medium-low. This is your simmer temperature.
Simmer for exactly 4 minutes. Set a timer. Whisk every 30 seconds to prevent skin from forming on top. The syrup will look too thin. Don’t panic and don’t add cornstarch yet. It thickens as it cools.
At the 4-minute mark, remove from heat immediately. Stir in vanilla extract. The residual heat will distribute it evenly.
Pour into a clean glass jar while still warm. A funnel helps if you’re using a bottle with a narrow neck. Let it sit uncovered on the counter until it reaches room temperature, then cap and refrigerate.
After 2 hours in the fridge, check the consistency. It should coat the back of a spoon and slowly drip off instead of running like water. If it’s still too thin, see the troubleshooting section below.
Common Failures and Tested Fixes
| Problem | Cause | Fix |
|---|---|---|
| Syrup too thin | Didn’t simmer long enough | Return to heat, simmer 2 more minutes |
| Grainy texture | Sugar didn’t fully dissolve | Reheat gently, stir until smooth |
| Syrup separated in fridge | Didn’t whisk during cooling | Shake jar vigorously or re-warm and whisk |
| Tastes bitter | Used natural cocoa without adjusting sugar | Add 1-2 tablespoons sugar, warm to dissolve |
| Too thick (paste-like) | Over-simmered or measured cocoa wrong | Whisk in 2 tablespoons warm water |
| Skin formed on top | Didn’t whisk during simmering | Strain through fine-mesh sieve |
The thin syrup problem trips up most people. They follow the recipe, and it looks watery in the pan. They assume it failed and try to rescue it by adding cornstarch or more cocoa. Don’t. Chocolate syrup thickens dramatically as it cools. What looks like chocolate water at 180 degrees becomes perfectly pourable at 40 degrees.
If you’ve refrigerated it for 3 hours and it’s still too thin, you under-simmered. Put it back in the pan, bring to a simmer, and go for another 2 minutes. Test by dipping a metal spoon in the hot syrup, then running your finger across the back. If the line holds without the syrup running back together, you’re done.
Grainy texture means undissolved sugar or seized cocoa. This happens when you add cocoa to water that’s too hot or don’t whisk enough. Fix it by reheating gently and whisking hard for 30 seconds. If that doesn’t work, strain through a fine-mesh sieve into a clean jar.
Variations: Vegan, Low-Sugar, Hot Fudge
| Version | Key Changes | Thickness | Best Use |
|---|---|---|---|
| Classic | Recipe as written above | Medium (coats spoon) | Chocolate milk, ice cream |
| Vegan | Replace sugar with coconut sugar 1:1 | Slightly thicker | Plant-based desserts |
| Low-Sugar | Use 1/2 cup sugar + 1/4 cup stevia blend | Same | Coffee, yogurt |
| Hot Fudge Style | Add 2 tbsp butter, simmer 6 minutes | Very thick (spreadable) | Sundaes, brownies |
The vegan version works perfectly with coconut sugar. It adds a subtle caramel note that some people prefer. The syrup comes out slightly darker and thicker because coconut sugar has more molasses content than white sugar. Everything else stays the same.
For low-sugar syrup, cut the granulated sugar to half a cup and add a quarter cup of a stevia-sugar blend made for baking. Don’t use pure stevia or it’ll taste medicinal. The market shows strong demand for reduced-sugar options as health concerns drive purchasing decisions. This version has about 40% less sugar per serving and tastes nearly identical.
Hot fudge style turns your syrup into something thick enough to spread. Add 2 tablespoons of butter with the cocoa powder and extend the simmer time to 6 minutes. It firms up in the fridge into a scoopable sauce that melts beautifully over warm desserts.
How to Make Chocolate Syrup Work for Everything
Chocolate milk takes 2 tablespoons per 8-ounce glass. Stir well or it settles at the bottom. For cold milk, warm the syrup for 10 seconds in the microwave first so it blends easier.
Ice cream needs about 1 tablespoon per scoop. Drizzle it on just before serving. If you add it too early, it’ll freeze hard.
Iced coffee works great with 1 to 2 tablespoons, depending on how sweet you like it. Add the syrup to hot coffee first, stir, then pour over ice. If you add it to cold coffee, it clumps.
Pancakes and waffles take about 2 tablespoons as a drizzle. It’s thinner than maple syrup but provides better chocolate coverage.
Milkshakes blend smoothly with 3 tablespoons per 2 cups of ice cream and milk. Add it before blending for even distribution.
For baking, substitute this syrup 1:1 for store-bought in recipes like chocolate poke cake or brownie glaze. It won’t change bake times or texture.
Storage is simple. Keep it in a sealed glass jar in the fridge for up to 2 weeks. If you want longer storage, freeze it in an ice cube tray. Pop out frozen cubes into a freezer bag. They last 3 months and thaw in 20 seconds in the microwave.
Blind Taste Test vs. Store Brands
I lined up five syrups: this homemade version, Hershey’s, a store brand, an organic brand, and a sugar-free option. My family tasted them blind on vanilla ice cream.
Homemade won on flavor intensity. People described it as having more real chocolate taste and less chemical sweetness. Hershey’s came in second for familiarity. The store brand tasted fine but thin. The organic version was too bitter for most testers. Sugar-free ranked last with a strange aftertaste.
For thickness, homemade and organic tied. Both coated ice cream better than the others. Hershey’s ran off the sides quickly. Store brand was the thinnest and soaked into the ice cream instead of sitting on top.
Color-wise, homemade looked darker and richer than everything except the organic brand. Hershey’s had a lighter, almost reddish-brown tone.
Price comparison isn’t close. Homemade costs about 66 cents for a batch that yields 1.5 cups. Hershey’s runs around 3 dollars for 24 ounces. Organic brands hit 6 to 8 dollars for 16 ounces. You save real money making your own, especially if you go through a bottle every couple weeks.
Frequently Asked Questions
How long does homemade chocolate syrup last?
It keeps for 2 weeks in the fridge in a sealed container. For longer storage, freeze it in ice cube trays for up to 3 months. Thaw cubes as needed.
Can I make it thicker?
Simmer it 2 minutes longer than the recipe calls for. If it’s already made and too thin, return it to the stove and simmer until it coats a spoon. For instant thickness, whisk in 1 teaspoon of cornstarch dissolved in 1 tablespoon of cold water, then simmer for 1 minute.
What’s the best vegan substitute?
Swap granulated sugar for coconut sugar at a 1:1 ratio. The recipe works exactly the same. You can also use maple syrup instead of granulated sugar, but reduce the water to 3/4 cup and skip the simmer step since maple syrup is already thick.
Can I make a sugar-free version?
Yes. Use a sugar substitute designed for cooking, like a stevia-erythritol blend. Replace the sugar 1:1 according to the package directions. The texture stays the same, though some substitutes leave a slight cooling aftertaste.
Why is my syrup grainy?
The sugar didn’t dissolve completely before you added the cocoa powder. Reheat it gently while whisking until smooth. If that doesn’t fix it, strain it through a fine-mesh sieve.
What does a batch cost compared to buying it?
Homemade costs about 66 cents for 1.5 cups. Store brands run around 3 dollars for a similar amount. Organic versions cost 6 to 8 dollars. You save roughly 80% making it yourself.
This recipe removes the guesswork. You get thick, rich syrup that actually tastes like chocolate instead of sugar water. It works the first time if you follow the simmer timing and don’t panic when it looks thin in the pan. Make a batch, keep it in the fridge, and you’ll have better chocolate milk than anything you can buy for the next two weeks.

")
