


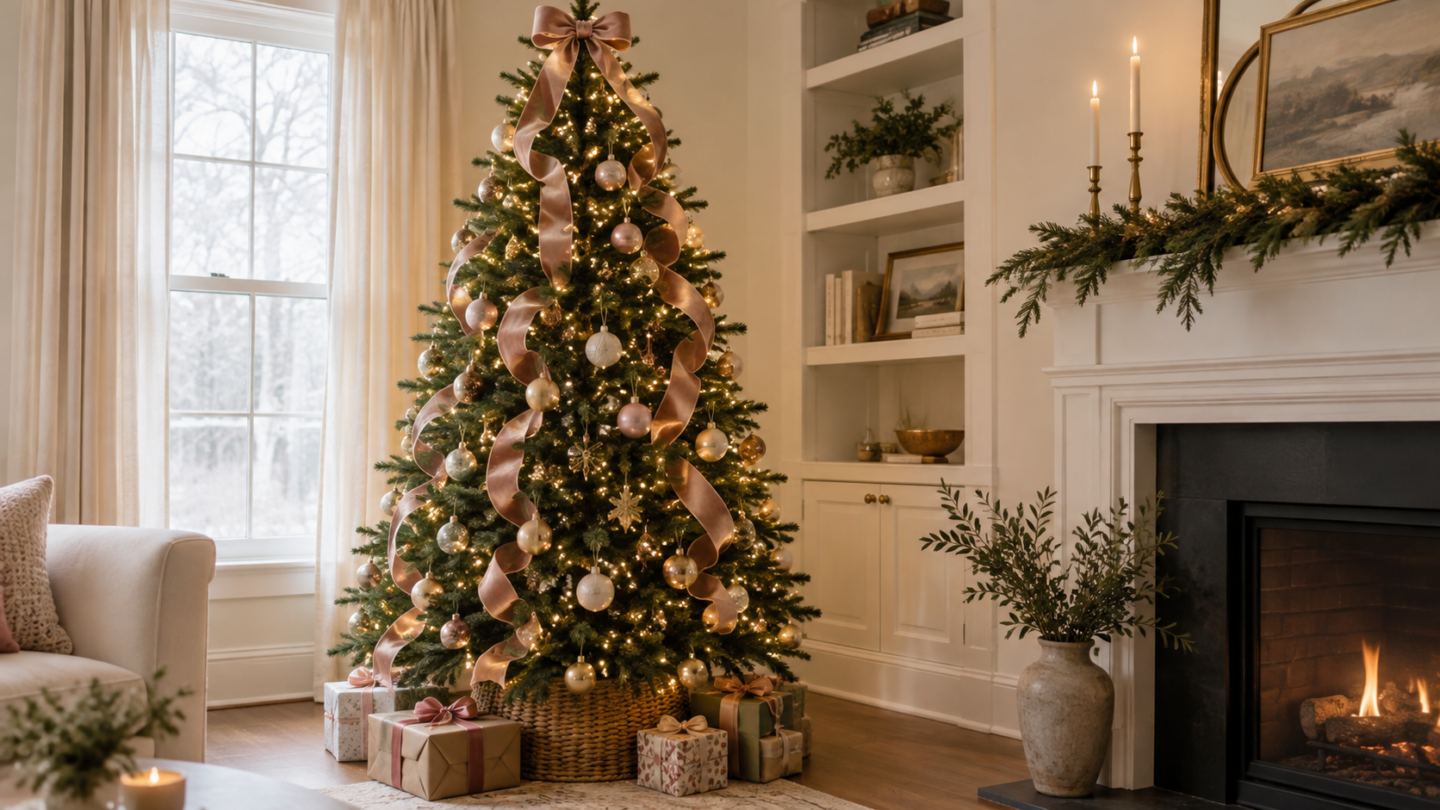
If you’ve ever wondered how to put ribbon on a Christmas tree without it looking like a gift wrapped by accident, you’re in good company. Here’s the short answer: add your lights first, cut wired ribbon into 18 to 24 inch strips, tuck them into the branches starting near the top, and hang your ornaments last. That’s the whole method in one breath.
Our honest take? Ribbon is the fastest way to make a tree look styled rather than just decorated. It adds color and texture, it’s forgiving if you’re a beginner, and it works whether your tree is 4 feet or 9 feet tall.
What You’ll Need
- A decorated base tree with lights already on
- Wired ribbon (easier to shape than plain ribbon)
- Scissors
- Ornaments and a topper (optional, for the final step)
Plan on two ribbon colors if you can. Mixing two shades or textures adds depth, and it makes the tree look more intentional. If you’re using one ribbon, buy a few extra rolls so you don’t run short halfway through.
Why Wired Ribbon Is the Easiest Choice
Almost any ribbon will work, but wired ribbon is the one to reach for. The wire holds its shape, so loops and tufts stay put without drooping. Plain satin or organza can still look lovely, but it’s harder to manage and tends to slide off the branches.
Step-by-Step: How to Decorate a Christmas Tree with Ribbon
Step 1: Set Up the Tree First
Put your lights on before anything else. If you have an artificial tree, fluff the branches fully so you have room to tuck ribbon in deep. Real trees need no fluffing, but give them a shake to settle the needles.
Step 2: Cut Your Strips
This is the tip that saves you the most time and money. Cut strips around 18 to 24 inches long rather than wrapping the ribbon around the whole tree. You’ll use less ribbon, and you’ll only cover the parts people actually see.
Start with a few strips and adjust from there. If the first strips look too short, go a little longer next time.
Step 3: Start Near the Top and Work Down
Begin near the top of the tree and work your way down. Pinch the middle of one strip, push that pinched section deep into the branches, and let the two ends fall outward. Repeat around the tree, spacing your loops so the color appears evenly.
Aim for depth. Push the ribbon far enough in that it anchors to a branch, otherwise it will slide out as you add ornaments.
Step 4: Choose a Method
Method A: Wrap and tuck (the easiest for beginners). Tuck a strip into the tree, let it loop outward, and then move to the next spot. Keep your loops tufted and billowy rather than flat. This gives a full, layered look.

Method B: Vertical cascades (the best for a modern feel). Trim strips to roughly the height of the tree and lay them vertically over the branches, anchoring the top and letting the bottom fall naturally. You can also attach a few strips near the top and let them spiral downward at a steep angle for a waterfall effect.
Some decorators prefer a mix of both: wrap and tuck for fullness, then a few cascades for movement.
Step 5: Add Two Colors or Textures for Interest
Work your second ribbon in between the first, not on top of it. Alternate colors section by section so neither one dominates. Velvet and metallic ribbons pair well together, as do a bold red and a soft cream.
Not sure which look to create? Explore these Christmas tree decorating ideas for more inspiration, from classic red and gold to softer, modern color combinations.

Step 6: Add Bows (Optional but Worth It)
Finish a few spots with bows. Place them near the top, along the cascades, or at the base of the tree. Keep the tails short or long depending on the look you want, then step back and check the balance.
Step 7: Hang Ornaments Last
Put ribbon before ornaments, not after. If you add ribbon once the baubles are on, you’ll bump and break them. Adding ornaments last also lets your ribbon show through between the ones you hang.
Choosing the Right Ribbon Width
Width changes the whole look. Wider ribbon gives a bold statement, while narrow ribbon looks more delicate. As a rough guide, a 2 to 3 inch ribbon works well on a 7-foot tree, and narrower ribbon suits smaller trees better. If your ribbon disappears into the branches, go wider. If it looks clunky, go narrower.
Common Ribbon Mistakes to Avoid
- Wrapping the whole tree like a gift. It uses too much ribbon and looks stiff. Strips and tufts look more natural.
- Cutting strips too short. Short pieces won’t reach a branch deep enough to stay put.
- Skipping the fluff on an artificial tree. Ribbon sits on the surface and looks flat.
- Adding ribbon after ornaments. You’ll knock ornaments off as you work.
- Using only one color. A single shade can look flat, especially on a tree with few ornaments.
Decorating Ideas for Every Household
For families with kids: Let the kids tie bows near the bottom of the tree, where they can reach. It’s a low-stakes job that makes the tree feel like theirs.
For parents short on time: Stick with wrap and tuck, one ribbon color, and a few bows. You can finish the whole tree in under an hour.
For couples decorating together: Split the work. One person places the strips and the other adds the bows and ornaments, then you both step back and adjust. It’s a fun way to make the tree your shared project.
For a showstopper: Layer three coordinating ribbons, mix wide and narrow widths, and finish with a bold topper. This look takes longer but delivers the wow factor.
Frequently Asked Questions
What’s the easiest way to put ribbon on a Christmas tree?
Wrap and tuck. Cut strips, pinch the middle of each one, push it deep into the branches, and let the ends fall out. Repeat around the tree, working from the top down.
Should I put ribbon on before or after ornaments?
Before. Ribbon goes on after the lights and before the ornaments, so you don’t knock baubles off while you work.
How long should Christmas tree ribbon strips be?
Around 18 to 24 inches works well for most trees. Start with a few and adjust based on how the first ones look.
Can I use ribbon on an artificial tree?
Yes, and it’s especially effective. Fluff the branches fully before you start so the ribbon has room to sit deep and anchor.
Make Your Tree the Heart of the Room
Ribbon is one of the most rewarding ways to decorate for Christmas, and you don’t need special skills to get a polished result. Start with your lights, cut a few strips, and work from the top down. Once you’ve finished one section, step back and see how it looks before you do the rest. Your first try will be your learning tree, and the next one will look even better.
